How to Use Midjourney for Product Photography
Updated · May 17, 2026
Your product exists. A professional studio shoot costs somewhere between $500 and $2,000 per day, before retouching. Midjourney can produce images that compete with those shoots for around $10 a month — but the gap between a passable result and a genuinely usable product image comes down entirely to how you construct the prompt. This walkthrough covers the full process: account setup, prompt structure, lighting control, and refinement, from nothing to a file you’d actually put on a product page.
Before you start, you’ll need:
- A Midjourney account — Basic plan at $10/month is enough to test; no free tier exists
- A clear description of your product: material, color, form, and any key visual details
- Reference photos of the real product, if you have them (optional but useful)
Set aside about 30 minutes for your first session. Expect to generate 15–25 images before landing on one worth keeping.
1. Set Up Your Account and Pick the Right Plan
Go to midjourney.com and sign in with a Google or Discord account. You’ll land on the Create tab — this is where you’ll spend almost all your time. The Discord interface still works, but the web UI is the faster way to iterate.
For a first session, the Basic plan ($10/month, roughly 200 fast GPU minutes) gives you enough headroom to test 60–80 prompts. If you’re generating images for a full product catalog, the Standard plan ($30/month) adds unlimited relaxed-mode generations plus 15 fast hours — more practical for volume work. Relaxed mode is free within the plan but takes 5–10 minutes per image; go to Settings → Image Speed → Fast while you’re learning, so iteration doesn’t stall.
2. Write a Prompt That Actually Describes Your Product
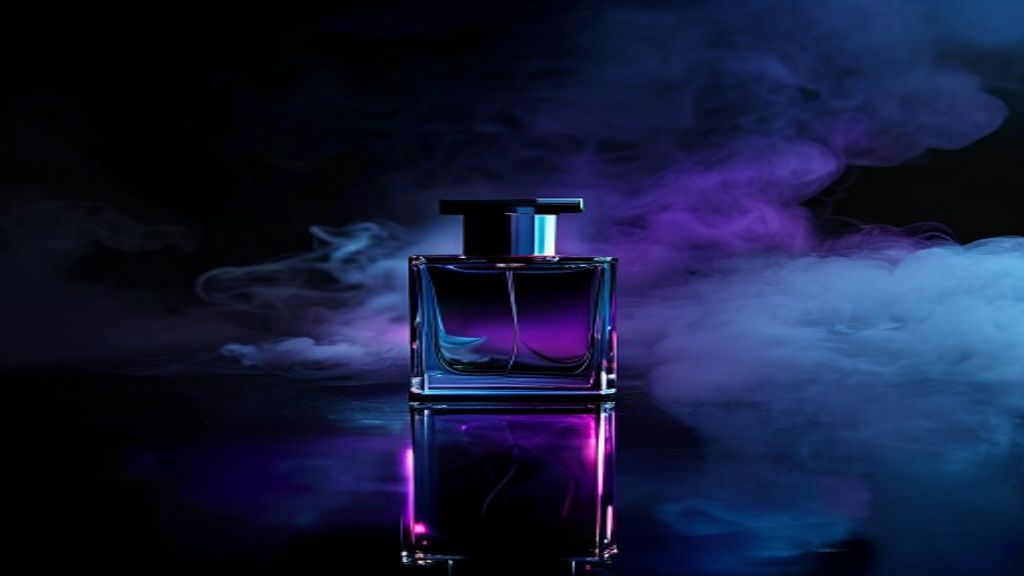
Most people type “a bottle of perfume on a white background” and wonder why the result looks like stock art. The problem is that Midjourney has no idea what your product looks like — you’re not describing a photograph, you’re commissioning one from scratch. Generic input produces generic output.
A structure that reliably works for product photography:
[product material + form] + [placement surface] + [background] + [lighting style] + [camera detail] + [parameters]
Here’s a concrete example for a skincare serum:
amber glass serum bottle with gold dropper cap, placed on white marble surface, pure white seamless background, soft diffused window light from the left, 85mm lens, shallow depth of field, commercial product photography –ar 4:5 –style raw –stylize 50
Each element is doing specific work:
- amber glass serum bottle with gold dropper cap — material and form. Don’t say “skincare product.” Describe what it actually looks like.
- white marble surface — gives the product a base to rest on; prevents the floating-object problem
- soft diffused window light from the left — names the quality and direction of light, not just that light exists
- 85mm lens, shallow depth of field — signals “product photography” to the model without overusing the phrase itself
- –ar 4:5 — Instagram-ready vertical format; use –ar 1:1 for square listings, –ar 16:9 for banners
- –style raw — reduces Midjourney’s tendency toward painterly or over-stylized output
- –stylize 50 — low values keep results literal, closer to your description
3. Control Lighting, Background, and Camera Angle
Lighting is where the difference between “AI image” and “product photo” actually lives. These descriptors produce reliably different moods:
- soft box lighting — even, commercial, good for e-commerce listings
- natural window light from the left — warm and editorial, works for wellness and food products
- dramatic single-source side lighting — high contrast, strong shadows, works well for fragrance and spirits
- backlit, light through translucent packaging — specific technique for products where the material itself is a selling point
Background control works the same way. If you need a clean white background for a marketplace listing, write pure white seamless background — not just “white background,” which tends to produce off-white or subtly textured surfaces. For lifestyle contexts, describe the full environment: rustic oak table, morning light, linen napkin in background, shallow depth of field blurring the surroundings.
Camera angle changes the shot type entirely. Overhead flat lay produces the arrangement-style shot common in food and beauty. Eye level is standard commercial. Low angle looking up slightly exaggerates scale — useful for bottles, cans, or any packaging where you want the product to feel substantial.
4. Refine with Vary Region, Then Upscale
When you get a result you mostly like but not quite: use Vary (Region) instead of regenerating from scratch. Click the Vary (Region) button beneath a promising image, draw a selection around the area you want to change — the background, the surface texture, the shadow — and describe the replacement in the text box. This lets you swap a plain background for a marble slab without losing the way the product looks.
Remix mode (enable it in Settings) lets you modify your prompt between each variation. This is the fastest way to A/B test lighting: run one batch with “soft diffused light,” then remix with “dramatic side lighting” to compare them side by side. Use V1 through V4 to branch off from whichever image in a grid is closest to what you want.
When you have a final image, click Upscale (2x) for web and social use, or Upscale (4x) if you need the image large enough for print. Download from the three-dot menu on the image. One important note: if your product has a label with specific text or a logo, expect it to be garbled or fabricated. Midjourney consistently fails at reproducing accurate text. Add –no text, labels, writing to suppress the attempt, then add correct label copy in Canva or Photoshop afterward.
When Results Look Wrong
The product changes every generation. Midjourney has no persistent memory of your product between sessions. Add –seed [number] to lock the composition. Find a seed you like by clicking the emoji-reaction icon on any generated image, then copy the job ID to retrieve the seed. Use Vary Region for adjustments rather than starting fresh.
The image looks AI-generated, not photographic. Lower –stylize to 0–25, add –style raw, and be more specific with your lighting description. If it still reads as artificial, try adding “commercial product photography, shot on Canon R5” — anchoring the implied camera model often pushes the output toward a more photographic look.
The background is never quite right. Instead of chasing perfect backgrounds inside Midjourney, generate the product on a plain white surface, then swap the background in PhotoRoom. PhotoRoom’s background replacement tool handles simple product shots in seconds and gives you more control than coaxing Midjourney into specific background textures across multiple attempts.
Taking It Further
The fastest upgrade to this workflow: use your actual product photo as an image reference. Drag a photo of the real product directly into the Midjourney prompt box (or paste an image URL), then describe the studio environment you want around it. The image reference anchors what the product looks like; the text prompt controls the environment. Try something like:
[your-image-url] amber glass serum bottle, white studio background, soft box lighting, 85mm lens, product photography –ar 1:1 –style raw –iw 1.5
The –iw parameter controls how much weight Midjourney gives to your reference image versus the text prompt. Values between 1 and 2 usually produce the most consistent results — higher than 2 and the model starts to copy the original photo too literally, defeating the purpose.
If you need consistent shots across a product catalog — same lighting, same surface, same visual treatment — save the seed from your best result and reuse it across sessions. It won’t guarantee identical compositions, but it significantly narrows variance. For any product with text-heavy packaging where Midjourney’s label rendering keeps failing, Adobe Firefly handles in-image text significantly better and integrates directly into Photoshop if you’re already working in that ecosystem.
Frequently asked questions
Can Midjourney generate images of my actual product?
Not directly — Midjourney doesn’t have a database of your specific product. You can add a reference image to anchor the visual style, but the tool will interpret rather than replicate. Accurate logos and labels need to be added in post-production.
How many generations does it take to get a usable product photo?
In our testing, a first usable result typically takes 10–20 generations, with 5–10 more refinements using Vary Region to get it to production quality. Budget roughly 30–45 minutes per product for your first few sessions; the process gets faster as you learn which prompt patterns work for your product type.
Does Midjourney work for lifestyle product shots, not just studio images?
Often better than studio shots — lifestyle prompts leave more room for creative interpretation, which is where Midjourney excels. The key is describing the full environment rather than just the product: “morning kitchen counter, ceramic mug, soft sunlight from the left, potted herb in the background, cozy atmosphere” consistently outperforms “mug on a table.”
If you’re producing product images at volume and a studio budget isn’t realistic, Midjourney is the most capable AI image tool for the job — provided you’re willing to iterate on prompts and handle text or labels in a separate editing step.
Try MidjourneyThis article contains affiliate links. If you subscribe through one, we may earn a commission at no extra cost to you. It never changes what we recommend — we only link to tools we actually use. Full disclosure.